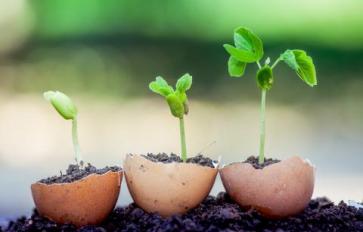
Do you want a healthy, environmental friendly, organic way to condition the soil for your home garden? In order to grow anything organic successfully, the soil needs to contain an adequate amount of nutrients and minerals. Essentially, the soil needs to be broken down into organic matter known as compost. With time, you can create your own compost by making a compost pile. For those who would like to know how, here are seven basic steps for creating a compost pile.
Basic Tools:
- Gardening Gloves
- Shovel (for layering)
- Garden Hose or Watering Can (to keep the compost pile moist)
- Pitch Fork (for turning compost pile)
- Borders (wooden pallets or chicken wire recommended)
- Tarp (for covering compost)
- Compost Thermometer
Step 1: Determine a Spot
Establish a good spot for your compost pile. This may require you to check on the composting rules and regulations based on the area you live in. Your spot of choice should be in a clear, accessible area. It is recommended that the compost pile be on bare earth and close to your garden, if possible.
Step 2: Place Borders
By placing borders around the area of your compost pile, you can easily control its size. An average home gardening compost pile is 3 to 5 feet in both height and width. Establish borders around your compost using items like wooden pallets or chicken wire, depending on the size of your compost. Using removable borders can make it easier if you decide later to move your compost pile.
Step 3: Create a Foundation
Start by placing twigs, leaves, and branches over the bare area. This will help with the process of breaking down the organic matter in your compost by giving it proper air flow. Some people use a wooden pallet or a brick foundation.
Step 4: Form Layers
When first beginning the process of a compost pile, it is highly recommended that you layer your compost pile. Layer the compost pile like so, using a pitchfork for plant matter and a shovel for the top soil.
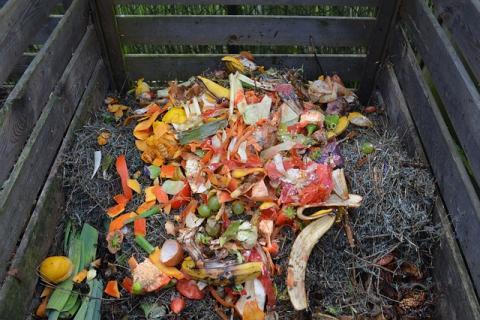
Layer 1: The first layer will include organic materials such as green matter, vegetable scraps, grass clippings, leaves, sod dust, garden waste, hay or straw.
Layer 2: The second layer includes things like starters, organic fertilizers, or manure.
Layer 3: The third layer will contain one to two inches of organic topsoil.
(Repeat)
Step 5: Manage Temperature
One of the important aspects for creating a successful compost pile is by managing its temperature. It is recommended that your compost pile be between 110° - 165°F. In order to keep track of your compost temperature, you can use a compost thermometer, which can be purchased at most near-by gardening stores. Temperature is important for the process of breaking down organic matter in your compost pile, and preventing a high production of things you don’t desire in your garden such as weed seeds, certain bacteria, or fungi.
One way to maintain the temperature is by watering your almost weekly. Depending on how dry your compost is, you may need to water it more often. Use either a gardening hose or watering can.
Turning your compost is another key practice for keeping your compost pile within temperature range. By turning your compost, you can ensure aeration, prevent your pile from combusting as well as keep the temperature even throughout the pile. It is recommended you turn your compost weekly, while being sure to mix the outside of the old compost material in with the new compost material. I would recommend using a pitch fork with four forks for turning because it is easier to keep matter from getting stuck on your forks, but I do know some people who prefer to use one with six forks.
If your compost is not reaching a high enough temperature, it is recommended that you add more nitrogen to your soil. Items such as kelp, manure, green grass clippings, and scraps from legume plants are great for adding nitrogen. Another suggestion for those who do not live in colder or rainier climates would be to place your compost pile in an area with no shade, and in an area with good water drainage.
Step 6: Cover
Covering your compost pile with a tarp during colder weather or at night can help with insulation and keeping your compost pile active. This may also help keep some pesky critters from digging in it as well.
Step 7: Wait
Like most good things, composting takes time. Most compost piles take anywhere from 3 to 4 months, or sometimes even longer, depending on the size and circumstances. You will know when your compost is ready because it will become dark, earth smelling, and soil-like in texture. When this happens, you can start mixing it in with your garden soil for conditioning.
These steps are just a simple and basic way to get started. There are many methods and approaches to creating your own compost and compost pile. The best advice I can give you is to stay organic, and do whatever works best for you.
Keep on the lookout for more organic home gardening tips and ideas.