I have to admit: I didn’t think I missed banana pudding until I made this recipe.
I used to eat banana pudding periodically as a child – it wasn’t my favorite, but it made a regular appearance at buffets and church potlucks, so I was no snob to it, either. It was often simply vanilla pudding served with slices of bananas and those little vanilla wafers; occasionally it was “real” banana-flavored pudding. I’m pretty sure all of it was made with a little packet of gelatin, though. And that’s why (before this recipe) I hadn’t eaten it in years.
Gelatin, the main ingredient in Jell-O, puddings, and other jelly-like foods, is made from animal products – it’s derived from collagen from skin, tendons, ligaments, and bones, to be exact. As a vegetarian, I try to abstain from consuming gelatin (I say “try” because it has a way of sneaking into some surprising foods – like yogurts, ice creams, candies, and vitamins – and companies sometimes change their recipes without warning). So I’ve passed on banana pudding the last few times I’ve been offered it.
When I ended up with about two dozen bananas (and once friends and family had had their fill of chocolate chip walnut banana bread), I knew it was time I perfected a banana pudding recipe. Some recipes recommend using agar agar as a vegan replacement for gelatin, but I’ve had pretty bad experiences with that substitute in custard-y pies (like pumpkin). And most homemade pudding recipes use egg or egg yolks as a thickener and binder, and to add creaminess and richness. I rarely have eggs on hand at home, so I wanted a recipe that didn’t require them, either. I settled on cornstarch as a replacement for both the egg and the gelatin (with some butter mixed in at the end for richness). My first couple of attempts at this recipe were lumpy, though. (No one wants lumpy pudding!) And I wanted to make sure there was plenty of banana flavor in the pudding itself (even without layering slices of bananas in it). The end result has you steeping the bananas in the warm milk to imbue it with their flavor, but then straining them out for a smooth-as-silk pudding that’s far from the neon yellow-colored version of my youth. To keep the lumps out, near constant whisking when adding the cornstarch is required, but the recipe is a piece of cake otherwise!
Sustainability and wasting as little food as possible are important, so when I was left with the banana mash after straining it out of the warm milk I had to find a use for it. Mixing it into oatmeal, berry bowls, or rice pudding is easy (and delicious!) enough, but I was really determined to make a vanilla wafer cookie to eat alongside the pudding (I had 4 hours while the pudding chilled to think about this, ok?). Pumpkin puree is often used as a replacement for eggs when baking – why not banana puree? And how perfect to use the leftover banana puree from the pudding in the cookie you eat alongside it -- compost the banana peels (or turn them into briquettes for burning) for additional no waste points.
I still had bananas leftover though, so just in case you do, too -- here are some more ways to use up those bananas!
1. Freeze them and make smoothies (lots of smoothies!)
2. Caramelize them and top pancakes, waffles, French toast, or ice cream
3. Make vegan French toast
4. Make pancakes
5. Freeze them and make ice cream
6. Make banana nut bread
7. Make banana cookies
8. Make whole wheat banana muffins
9. Give yourself a mini-manicure
10. Make banana butter
11. Make banana oat porridge
12. Dip them in melted chocolate and then freeze them
13. Make grilled banana boats
14. Make banana splits

Homemade Vegan Banana Pudding (with dairy option)
After steeping the bananas in the warm milk, set aside to use in the vanilla wafer recipe below (or mix into oatmeal or rice pudding).
You can mix in ½ teaspoon of cinnamon and ¼ teaspoon of nutmeg if you’d like, but I prefer to garnish individual servings with seasonings at the end for a dash of color.
What You Need:
4 bananas
2 ½ cups almond milk (or use whole milk)
1/4 cup sugar
1/8 teaspoon salt
3 Tablespoons cornstarch
1 1/2 teaspoons vanilla extract (or use a vanilla bean)
2 Tablespoons vegan butter (or use regular butter)
What You Do:
- Slice bananas into ½-inch pieces or smaller.
- Pour ½ cup milk into a small bowl. Slowly add about ½ teaspoon of cornstarch at a time, mixing well with a fork after each addition, to ensure no lumps. Blend well.
- In a saucepan, heat 2 cups of milk, sugar, and salt over medium-low heat.
- Once the mixture is steaming, add the small banana pieces to the heated milk. Let steep for 30 minutes over low heat.
- Strain out the bananas (they’ll likely be a mushy puree at this point; that’s ok) and return the milk mix to the pan. (Set the bananas aside for the vanilla wafer recipe, or use in another dish.)
- Quickly whisk the cornstarch mix again to make sure it’s thoroughly blended and then slowly add it to the warm milk mixture, stirring while adding.
- Cook over low-medium heat, stirring fairly regularly, until mixture just starts to boil, about 4-6 minutes.
- Reduce heat to very low and cook, stirring often, for another 5-7 minutes, or until mixture thickens. Stir in the butter and vanilla extract.
- Pour the mixture into individual ramekins or bowls, or into a large glass dish. Cover it with plastic wrap directly touching the pudding top (to prevent “skin” forming) and refrigerate until chilled and firm. Serve within 36 hours, garnished with vanilla wafer cookies, slices of banana, and a dash of cinnamon, if desired. For extra decadence, serve with caramelized banana slices and whipped cream!
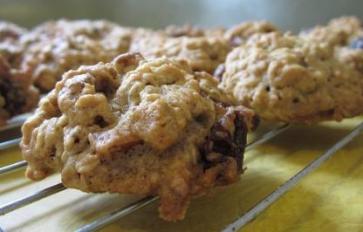
Vegan Vanilla Wafer Cookies
This recipe makes a lot of little cookies, or about 20 large cookies.
What You Need:
1 1/2 cups all-purpose flour
1 cup whole wheat flour (can use all-purpose instead)
2 teaspoons baking powder
3/4 teaspoon baking soda
½ teaspoon salt
1 cup sugar
½ cup banana puree
6 Tablespoons vegan butter, melted but cool (optional: use butter or coconut oil)
3 Tablespoons maple syrup
4 teaspoons vanilla extract
What You Do:
- Preheat oven to 325°F. Line two baking sheets with parchment paper or alternative.
- In a bowl, mix together the flours, baking powder, baking soda, and salt until well blended.
- In a separate bowl, mix together sugar, banana puree, butter (or coconut oil), maple syrup, and vanilla until well blended.
- Add dry mixture to wet and stir until combined. Batter will be thin.
- Make cookies. You can do this a couple of ways. I prefer to spoon them onto the parchment, but the dough is very runny so this is a little messy. Instead, you can put the dough in a plastic bag and cut off the end, and then squeeze out cookies onto the parchment. Either way, try to keep the cookies flat, pushing them down with your fingers or a spatula if necessary.
- Bake cookies at 325°F for about 12-15 minutes, or until golden brown.