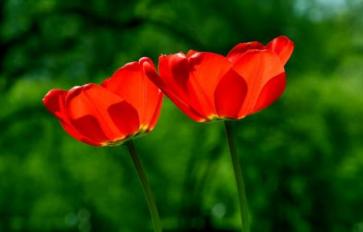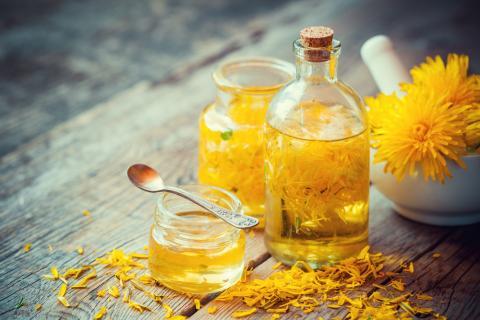
Summer has officially arrived and so have her flowers. It’s time for the second round of dandelion blooms, which brings a great opportunity to make some mead for your next summertime get together! Next time you see the dandelions popping up in your yard, remember how useful the little plant is, run out and pick that fantastic yellow flower knowing that soon you will turn it into a delicious and fun drink that tastes like liquid sunshine!
Mead is a honey-based, alcoholic beverage that has been around almost as long as humans have been making food. Like most of our fermented food products, it is suspected that mead was discovered by accident, after a jar of honey was left out in the rain, diluting is preservation power, and allowing the natural yeasts present in the honey to activate and start digesting the sugars into alcohol. Almost every culture in the world that has access to honey has a form of mead, from Finland to Ethiopia (called “Tej”)!
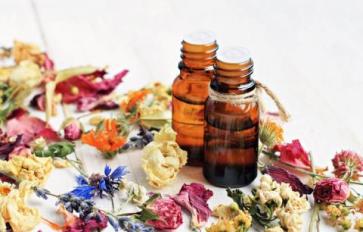
Some mead recipes call for store-bought champagne yeast to get your mead fermenting. If you want to make this strictly traditional style of mead, you can find wine making instructions here. I would like to introduce to you the wild side of wine making. The wild fermentation method of wine making, first written down by Sandor Katz, captures the naturally present yeasts in the honey and uses them to ferment the wine. This process mimics the original way of fermenting foods, before we were able to capture specific yeasts and commercialize them. The results are far less predictable, but rife with possibilities. Here is one way to make some wild dandelion mead. Happy fermenting!
Wild Dandelion Mead
Ingredients
- 3 lbs. (appx. 48 oz.) wild, unfiltered and preferably local honey
- 1 gallon filtered water
- 3 cups dandelion flower heads with the green sepals removed
- 1/4 cup raisins
Gear
For the primary fermentation:
- 2-gallon starter jar such as a mason jar or crock
- clean cloth
- wooden spoon
For the secondary fermentation:
- 1-gallon carboy
- Airlock and bung
- Cheese cloth and funnel
- 1/4 cup honey water
For the tertiary fermentation:
- 12, 16 oz. Swing-top Grolsch style bottles
- siphon (or a funnel with cheesecloth)
- 1/4 cup honey water
Directions
Primary Fermentation (1 week)
This is the wild part of the process. While meads made with champagne yeast go straight to what I call the “secondary fermentation,” this mead needs to catch its yeast first. We “catch” the yeasts by placing all the ingredients into the clean 2-gallon crock or jar and stirring them until the honey is dissolved. Cover the top of the jar with the clean cloth to prevent unwanted molds and bacterium from being able to reach the concoction and place the jar in a warm, dark place. For the next week, stir the baby mead at least twice a day, catching the wild yeasts that have landed in the mead and encouraging them to eat well—when they eat, we get alcohol! Stirring also prevents the growth of molds. Once you can see that the mixture has bubbles in it, it’s time to move the mead to the secondary fermentation.
Secondary Fermentation (2 weeks)
Depending on what you want your results to be, this is the second and last step in the process of making mead. Make sure the dandelion bits and yeast deposits are on the bottom of the primary fermentation vessel. Transfer the now fermenting honey water from the crock or jar into the carboy, making sure to filter out the flower petals and yeast deposits. If you have a siphon, you can siphon the liquid into the carboy. If not, use a funnel with a cheesecloth to pour the mead from the jar into the carboy, leaving the bottom layer of deposits in the jar. Kick start the yeasts by feeding them a little more honey water, then stopper the carboy with the bung and affix the airlock into the bung. Leave the carboy in the same warm, dark place for the next two weeks or taste test the mead along the way to decide when you want to stop the fermentation. Once this is done, you can refrigerate and consume this mead as-is! If, however, you want to add some sparkle to your mead, move on to the optional third fermentation.
Tertiary Fermentation (2 weeks)
If you would like to add a little carbonation and bottle your mead, follow these directions. The most straight-forward bottling method is using Grolsch style, swing-top reusable bottles with a rubber gasket. It is easiest to have a siphon for this part of the process for getting the liquid into the bottles, but if you do not have one you can use the funnel and cheese cloth method from the secondary fermentation above. Transfer the mead into the bottles, making sure to leave at least one inch of head space in the bottle. Give each bottle a small dash of honey water (NOT TOO MUCH! These bottles can become highly pressurized and adding too much sugar can build the pressure too much) and leave to ferment for two weeks. After this point, move the bottles to the fridge to stop fermentation.
Choosing to ferment your mead with wild yeasts not only saves on some of the cost of making homemade wine, but adds a truly local flair to your mead. Cheers!