Local, raw milk is one of the greatest gifts that cows can give us. You can feel good about consuming local raw milk because in most cases you are building a direct relationship between yourself and your food source. If you are nervous about consuming raw milk, I encourage you to go out to the farm where the milk is produced and see for yourself how the process works. Any farmer that cares about their consumer will be happy to show you their set-up and introduce you to their cows. As long as the facilities are clean and the cows are pastured in a healthy, clean place, the milk will be safe to consume.
Not only will it be safe, it will be one of the most nutritious milks you can find. Because the milk has not been ultra-pasteurized, there are loads of beneficial bacteria present. It’s living food! The raw milk bacteria are extremely beneficial to gut health, and gut health is in turn directly related to mental health.
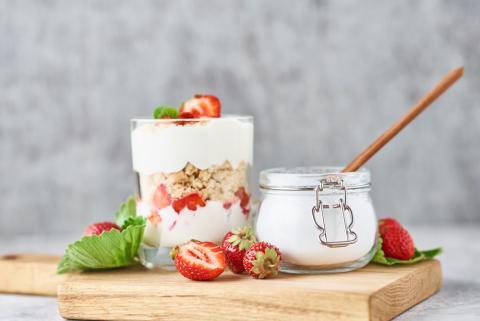
In this series, I will be giving you my techniques for homemade dairy products out of raw milk. These are techniques I use in my own home to make yogurt, cheese, whey, butter, and buttermilk! If you do not enjoy drinking milk straight, these products are a fantastic method for getting the most out of your milk and can be used for many different meals.
Let us firstly talk about yogurt. I like to begin by making yogurt because it can be used as a foundation for going on to create more milk-based products such as cheese and whey. Yogurt will also extend the life of your raw milk from many days to many weeks and is a summer must-have. I use yogurt daily in my post-work smoothie, which is a great pick-me-up at the end of a hot day teaching outside.
What You Need To Make Yogurt
To make yogurt, you will need the following equipment:
- Large pot. I use a stainless-steel soup pot.
- Thermometer. You need one that can read at least up to 150 degrees Fahrenheit. I use a glass candy thermometer.
- Clean glass jars and lids. Sizes depend on the quantity of yogurt you want to make. I usually make two quart jars, i.e. a half gallon.
- Hard-sided, outdoor cooler. This needs to have the capacity to hold the quantity of jars you want to use and a top to seal in the heat that you need to ferment the yogurt.
- Whisk.
- A plain starter yogurt. For two quarts of yogurt, I need at least a half cup of starter yogurt. I choose a yogurt that’s flavor is particularly good to me. It can be commercially made as long as it is plain yogurt with no added sweeteners and the container indicates that it contains live and active cultures. Yogurt is much like a sourdough starter in that each starter has a unique combination of bacteria that produce its flavor. Choose the yogurt you like best to make a flavor akin to it. Please note that it is very important that your starter yogurt is plain and sugar-free. Flavored yogurt with sweetener will not work well with home fermented yogurt. Also, if you are making more than a half-gallon of yogurt, you will want to use a larger volume of starter yogurt. Usually a quarter cup per quart of yogurt is a good ratio.
- A quantity of milk. For my two quart jars of yogurt I measure out the quarts (or half gallon) and then remove a half cup to compensate for the half cup of starter yogurt that I will add later. If you do not compensate and remove the appropriate volume of milk then your jars will be overflowing!
- A few ice cubes.
How To Make Yogurt
Making yogurt is all about setting up an environment in which lactobacillus are active and can digest the sugars of the milk. This digestion by bacteria is one form of the process we call fermentation. To give an outline, you need to raise the heat of the milk to a friendly lactobacillus temperature, add the bacillus, and then incubate it for 8-10 hours. A longer fermentation yields a sourer yogurt. Once the milk is digested by the lactobacillus, you can refrigerate it to slow the fermentation.
Here's how to get started…
- Pour the milk into the pot and add the ice cubes. If you can attach the thermometer to the side of the pot this is a good time to add it so you can monitor the temperature of the milk.
- Put the milk on low to medium heat and slowly bring it to a boil. The ice cubes help prevent the skim of cooked milk to form on top of the heating milk, but you may want to stir the milk occasionally to prevent this from happening.
- Slowly raise the milk to 150 degrees Fahrenheit to very lightly pasteurize it. You may choose to hold the milk at this temperature for up to 10 minutes to more thoroughly pasteurize it, but I usually feel comfortable bringing the temp to 150 and then letting it go.
- Pull the milk off the heat and set it to cool to 120 degrees Fahrenheit. This may take 30 minutes or more depending on your room temperature.
- While you wait for the milk to cool, boil a kettle of water and pour it into the cooler, which is now an incubator. (Coolers are really just insulated boxes and so they will hold the temperature of whatever you put into them. This makes a cooler a perfect fermentation box and allows you to bypass the need for a fancy yogurt maker or difficult oven set-up.) Build a water bath that is at 120 degrees Fahrenheit in the cooler. It should be deep enough to set your jars in but not so deep that the jars are floating around.
- Once the milk has cooled to 120 degrees, add your yogurt starter and whisk to incorporate it into the milk.
- Pour the milk and yogurt mixture into your clean jars.
- Seal the jars with the lids and place them into the cooler/incubator for 8-10 hours.
- Once the time has passed you should be able to pick up the jars, turn them on their sides and see that the milk has become a solid. Congratulations! You have made yogurt!
Enjoy using your yogurt as a replacement for sour cream on your tacos and burritos, as a companion to spicy Indian dahl, in your beauty regimen, and in delicious summer smoothies such as the one below!
Summer Nectar Smoothie
Serves 1
Ingredients
- 1/4 cup blueberries
- 1/3 frozen banana
- 3 dates
- dash of cinnamon
- dash vanilla extract
- 1/2-3/4 cups plain yogurt
- 1 Tablespoon almond butter
Directions
- Place all items in a blender.
- Blend until smooth.
- Enjoy!