Seed paper is more than just fun to make: It's eco-friendly. It's a great way to give back to the earth. After all, paper is made from trees. It seems only right to return paper to the earth so it can grow new life again. The best part about making seed paper? It's relatively easy. Anyone can do it and it's a great activity to do with kids or in the company of friends. This guide will teach you step-by-step how to make it without much hassle.
How To Make Seed Paper To Plant
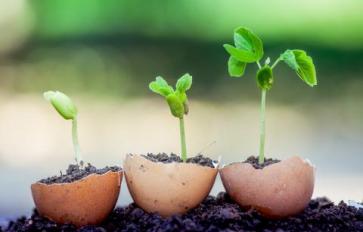
I recommend using small seeds (they work best), like basil, parsley, oregano (herbs), bird’s eye, clarkia, black-eyed Susan, sweet alyssum, English daisy, catchfly, and snapdragon (flowers).
Ingredients
- paper (Try to use paper without ink on it, like new computer paper. Of course, minimally processed paper is ideal.)
- seeds (seed recommendations are listed in the intro paragraph)
- mixing bowl
- hand blender
- cloths or towels
- cookie cutters to make tag shapes (if desired)
- piece of plastic sheet or parchment paper
Directions
- Take the paper and tear it into small pieces. You can use as much paper as you’d like—it depends on how much plantable seed paper you’d like to make. I’d recommend tearing up at least 4 pieces of paper.
- Cover the paper with water and leave it to soak until the paper is fully saturated. This may only take a few hours, but I suggest leaving it overnight for the best results.
- Use a hand blender to blend the paper into a pulp.
- Squeeze the excess water from the pulp and make sure all lumps are removed: The paper pulp should be well mixed.
- Add a handful of seeds to the paper pulp. The amount of seeds you add will depend on the type of seeds you choose to use and the finished effect you’re looking for. I suggest sticking to one type of seed for this process, so the seeds will have a chance to grow better.
- Mix the seeds well using your hands or a spoon. Do not use the hand blender—otherwise you will damage your seeds!
- If you would like to create tag shapes with your seed paper, get your cookie cutters ready. You’re going to use them as molds to make plantable seed gift tags. To do this, just place the cookie cutter onto a piece of plastic sheet (or parchment paper) and press the paper pulp firmly into the shape for even coverage. Try not to make the paper too thick, as it will take longer to dry. Use a towel to press as much water as you can from the paper pulp (this will help it dry faster).
- If you’d like to make actual paper (paper that can be used to write notes or create cards), I suggest getting an empty picture frame and placing it on top of a plastic sheet or parchment paper. Just pour the paper pulp over the frame, using your fingers to smooth it out over the plastic sheet/parchment paper. Use the towel to press out any excess water.
- No matter if you choose to make plantable seed gift tags or full-sized paper, get to drying the seed paper quickly: The seeds will actually start to grow if you don’t! To do this, just place the seed paper in a warm (not hot) environment and ensure the air can circulate around it. You can also blow the seed paper dry using a hair dryer—just make sure it’s on a cool setting.
- When it’s completely dry, you can use the paper however you see fit. I recommend investing in some soy-based ink to use on the paper if you want to write on it or decorate it. This is because any non-plant-based inks might disrupt the growth of the seeds. Most importantly, have fun!
Photo Credit: "DSCN5976" by Martha Starke is licensed under CC BY 2.0